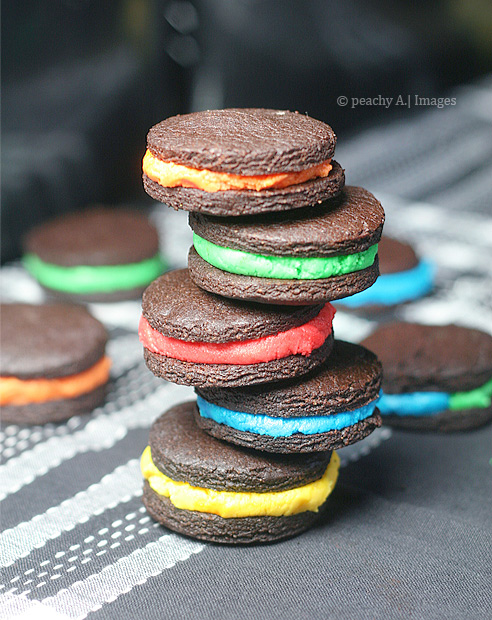
FAUXREOS: Homemade Oreo Cookies
Ingredients
Scale
Cookies
- 3 ounces/85g/ 6 tablespoon unsalted butter, room temperature
- 3 3/4 ounces/106.3g / ½ cup sugar
- 1 1/2 ounces/42.52g/ 3 tablespoon brown sugar
- 3/4 teaspoon salt
- 1/4 plus 1/8 teaspoons baking powder
- 1/4 teaspoon baking soda
- 1/2 teaspoon instant coffee powder
- 1 1/2 teaspoons vanilla extract
- 2 egg yolks
- 4 ounces/113.4g / ¾ cup all purpose flour (or rice flour), sifted
- 3 ounces/85g / 1 cup cocoa powder, sifted
For the filling
- 2 ounces/56.7g/ 4 tablespoon shortening or unsalted butter at room temperature
- 5 ounces/141.7 / 1 ¼ powdered sugar, sifted
- 1 teaspoon vanilla extract
- a pinch of salt
Instructions
- To make the cookies: Using a hand or stand mixer set to medium speed, cream together butter, both sugars, salt, baking powder, baking soda, espresso powder, and vanilla extract until combined. With mixer still running, add in egg yolks one at a time. Once incorporated, shut off mixer and scrape bowl down with a rubber spatula.
- Turn mixer to its lowest setting. Dump in flour and cocoa all at once. The mixture will be stiff. Continue mixing until uniform. Shut off mixer. Use a spatula to scrape the dough from the bowl and knead lightly to form a smooth ball. Use your hands to flatten into a disc.
- You may begin rolling the dough right away, or you may wrap it with plastic and refrigerate for up to a week. If you’ve kept the dough refrigerated, let it sit at room temperature to soften before starting to roll
- Preheat oven to 350°. Sift some cocoa powder onto the counter (using cocoa instead of flour gives the Fauxreos their uniquely dark color). Use a rolling pin to roll the dough to 1/8″ thickness.
- When finished, slide a metal spatula between the dough and counter to loosen. This will prevent the cookies from sticking.
- A 2″ round cutter makes perfect “Oreos” but use any cutter you like. Cut out the cookies and use a metal spatula to lift and transfer to cookie sheet.
- Arrange cookies on ungreased cookie sheet. (If the cookie sheet is dinged up or uneven, line with parchment paper first.) The cookies will not spread during baking, so they may be arranged quite close together. Set the sheets aside
- Gather up, knead, and re-roll the remaining dough scraps, likewise cutting and arranging on a cookie sheet.
- To add texture to the cookies, place any remaining dough in a mixing bowl. Mix with a hand or stand mixer and add about 1 tsp of hot water or coffee. Continue adding hot water/coffee, a teaspoon at a time, until the dough has thinned into a paste. You can always add more liquid, but you can’t take it away. Add slowly and let each addition mix in fully before adding more. When the mixture reaches a frosting-like consistency, use a spatula to scrape it out. Transfer to a piping bag fitted with a very small tip, or a heavy duty Ziploc bag with a tiny hole poked in the corner.
- Pipe some sort of design atop each cookie. A tight cornelli design gives the impression of an Oreo. But anything will do, have fun with your designs!
- Once the cookies have been decorated, bake for 10 – 12 minutes, or until firm to the touch. If your oven has an uneven heating element, rotate the cookie sheets after six minutes. Once the cookies have baked, cool thoroughly, directly on the cooling rack.
- To make the filling: With a hand or stand mixer, cream together shortening/butter, powdered sugar, vanilla, and salt. Cream on medium speed for five minutes; use a rubber spatula to scrape the bowl down periodically. The long mixing time aerates the filling, making it especially white and less gritty.
- Using a spatula, transfer the filling to a pastry bag fitted with a plain tip. Alternately, portion with a melon-baller sized ice cream scoop, or by using Ziploc bag with the corner snipped off as a makeshift pastry bag.
- To assemble the cookies: Flip half the wafers upside down. Onto each, pipe or scoop 1 teaspoon of filling (specifically: 1/4 oz for Double Stuf, 1/8 ounce for regular) directly into the center. To finish, top with remaining wafers and press down with your fingers, applying very even pressure so the filling will spread uniformly across the cookie.
- Transfer cookies to an airtight container and refrigerate for several hours. This is crucial. After whipping the filling, it will be quite soft. Refrigerating it (especially if you’re using butter) will solidify the filling, restoring its proper texture, and bonding it with the wafers. Serve.